About Me
Wednesday, June 15, 2011
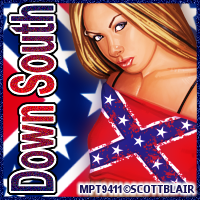
 Ju Ju Bone-PTU

***This tutorial is for advanced PSP users only- it is not intended for beginners***
Supplies Needed:
Tube of choice-I used a Elias Chatzoudis-here
( I purchased this tube at MyPspTubes)
Scrapkit-I used Ju Ju Bone by Wicked Creationz Scraps-here
Font of choice
Mask of choice
Mask of choice
Open new canvas 600x600
White background-we will be deleting this later
Its just easier for me to work on
Paste frame 1 as new layer and resize if needed
Center in canvas
Click inside with magic wand
Expand by 3
Paste paper 8 as new layer
Invert and delete
Paste tube as new layer
Center
Duplicate and hide tube layer
Back on original layer and hit delete
Deselect
Unhide duplicated tube
Using your eraser , carefully erase the bottom of the tube
that is hanging over the frame bottom
Arrange the following elements along the bottom of frame
Going left to right and resizing as you go
BOOK
MAGIC BALL
ROSE
BEAR
BOTTLE OF JU JU
MARTINI
CUPCAKE
CANDELABRA
PLACE CHERRY ELEMENT TO THE LEFT OF THE FRAME
Arrange the following elements along the bottom of frame
Going left to right and resizing as you go
BOOK
MAGIC BALL
ROSE
BEAR
BOTTLE OF JU JU
MARTINI
CUPCAKE
CANDELABRA
PLACE CHERRY ELEMENT TO THE LEFT OF THE FRAME
Don't forget to add all copyright information
Kit makers like to be acknowledged as well
Now grab your cropping tool
Crop any excess canvas we did not use
Now is when you will resize your canvas to as size
you're comfortable with
Then you can go ahead and delete that white background layer
so you can have a nice clear transparent background
Merge visible layers and you are finished.
Thank you for following my tutorial.
Dreamer-PTU

***This tutorial is for advanced PSP users only- it is not intended for beginners***
Supplies Needed:
Tube of choice-I used a Arthur Crowe-here
Scrapkit-I used Dreamer by Wicked Creationz Scraps-here
Font of choice
Open new canvas 600x600
White background-we will be deleting this later
Its just easier for me to work on
Paste frame 3 as new layer
Center
Click inside with magic wand
Expand by 3
Paste paper 2 as new layer
Invert and delete
Paste tube as new layer
Center
Duplicate and hide tube layer
Back on original layer and hit delete
Deselect
Unhide duplicated tube
Using your eraser , carefully erase the bottom of the tube
that is hanging over the frame bottom
Using the following elements going from left bottom of the frame to the
right and resizing as you need as you go-
CUPCAKE 2
BACKPACK
BEAR
MARTINI
BOTTLE OF DREAMS
HEAD PHONES
Paste bow as new layer and place to the left of frame
Place cherry on top of bow
Don't forget to add all copyright information
Kit makers like to be acknowledged as well
Now grab your cropping tool
Crop any excess canvas we did not use
Now is when you will resize your canvas to as size
you're comfortable with
Then you can go ahead and delete that white background layer
so you can have a nice clear transparent background
Merge visible layers and you are finished.
Thank you for following my tutorial.
Friday, June 10, 2011
Dark Angel-PTU

***This tutorial is for advanced PSP users only- it is not intended for beginners***
Supplies Needed:
Tube of choice-I used a Elias Chatzoudis-here
Scrapkit-I used Dark Angel by Wicked Creationz Scraps-here
Font of choice
Mask of choice
Mask of choice
Open new canvas 600x600
White background-we will be deleting this later
Its just easier for me to work on
Paste gothic frame as new layer and center in canvas
Click inside with magic wand
Modify and expand by 2
Paste paper 9 as new layer
Invert and delete
Do not deselect yet
Move paper layer under frame layer
Paste dark mist element as new layer
hit delete once more
Paste tube as new layer
Duplicate and move to top of layers
Hide duplicated layer
On the original tube layer hit delete once more
Now you can deselect all
Unhide the duplicated tube layer
With your eraser , erase the bottom of the tube that
is hanging over the frame
Arrange the following elements along the bottom
of frame- resizing as you go and adding a ds
CRYSTAL BALL
POTION
SPELL BOOK
BLACK BIRD
Paste tree element as new layer
Resize and paste to the left of frame
Paste safety pins as new layer
Place to the right of frame
Duplicate and flip
Adjust slightly as needed
Paste moon element as new layer
Place behind tube layers
Repeat with stairs element
Paste wicked plate as new layer
Place in top right corner of frame
Rotate to left slightly
Paste paper 1 as new layer and move to bottom of layers
Apply your mask and merge group
Don't forget to add all copyright information
Kit makers like to be acknowledged as well
Now grab your cropping tool
Crop any excess canvas we did not use
Now is when you will resize your canvas to as size
you're comfortable with
Then you can go ahead and delete that white background layer
so you can have a nice clear transparent background
Merge visible layers and you are finished.
Thank you for following my tutorial.
Monday, June 6, 2011
So Conceited-PTU

***This tutorial is for advanced PSP users only- it is not intended for beginners***
Supplies Needed:
Tube of choice-I used a Elias Chatzoudis-here
Scrapkit-I used So Conceited by Wicked Creationz Scraps-here
Font of choice
Mask of choice
Mask of choice
Open new canvas 600x600
White background-we will be deleting this later
Its just easier for me to work on
Paste frame 1 as new layer
Place in middle of canvas
Click inside with magic wand
Paste paper 4 as new layer
Invert and delete
Paste tube of choice as new layer
Center and duplicate
Close of duplicated layer
On original layer hit delete and deselect
On the duplicated layer erase the parts of the tube hanging over
the bottom
Arrange the following elements along the bottom of your frame
From left to right-resizing as you go
Martini glass
Angel cupcake
Lace up heart
Martini glass
Bottle of conceited
Bomb
Paste flutterby as new layer and place on the left side of frame
Paste tribal flower behind the flutterby
Paste paper 3 as new layer and move to bottom of layers
Apply your mask and merge group
Don't forget to add all copyright information
Kit makers like to be acknowledged as well
Now grab your cropping tool
Crop any excess canvas we did not use
Now is when you will resize your canvas to as size
you're comfortable with
Then you can go ahead and delete that white background layer
so you can have a nice clear transparent background
Merge visible layers and you are finished.
Thank you for following my tutorial.
Sunday, June 5, 2011
Best Summer Ever -PTU

***This tutorial is for advanced PSP users only- it is not intended for beginners***
Supplies Needed:
Tube of choice-I used a Elias Chatzoudis-here
Scrapkit-I used Best Summer Ever by Wicked Creationz Scraps-here
Font of choice
Mask of choice
Mask of choice
Open new canvas 600x600
White background-we will be deleting this later
Its just easier for me to work on
Open paper 1 and put it to the bottom and go back to your white canvas
Grab your eclipse tool
make the foreground color the paper texture that you have open
And your background color null
Draw a circle out in the middle of the canvas
As big or as small as you'd like it
Covert to raster layer
Click inside with your magic wand and expand by 2
Paste paper 3 as new layer
Invert and do not deselect
Move paper layer under frame layer
Paste your tube as new layer and duplicate
Move duplicated layer to top of layer palette and hide
Back on the original tube layer hit delete
Deselect all
Unhide duplicated tube and erase whats hanging over bottom
of frame
Paste starfish as new layer and place to the left of frame
Duplicate and mirror
Paste the following elements and arrange along the bottom of the frame
Resizing as you go:
SANDALS
SUNGLASSES
FLOWER2
BOW
Paste seashell as new layer and put the the left of frame
Duplicate and mirror
Paste paper 7 as new layer and move to bottom of layers
Apply your mask and merge group
Don't forget to add all copyright information
Kit makers like to be acknowledged as well
Now grab your cropping tool
Crop any excess canvas we did not use
Now is when you will resize your canvas to as size
you're comfortable with
Then you can go ahead and delete that white background layer
so you can have a nice clear transparent background
Merge visible layers and you are finished.
Thank you for following my tutorial.
Saturday, June 4, 2011
Dominion-PTU

__________________________________________________________
***This tutorial is for advanced PSP users only- it is not intended for beginners***
Supplies Needed:
Tube of choice-I used a Keith Garvey-here
Scrapkit-I used Dominion by Wicked Creationz Scraps-here
Font of choice
Mask- I used a awesome mask from Just Lil Ole Me-Here
Thank you Beth:)
Open new canvas 600x600
White background-we will be deleting this later
Its just easier for me to work on
Paste frame 1 as new layerResize about 80% and center
Click inside the frame with magic wand
Expand by 2 and paste paper 3 as new layer
Hit delete and move paper under frame layer
Do not deselect yet
Paste close up of tube in frame
Adjust till you're happy and hit delete
Make sure the tube layer is between the frame and paper
You can now deselect all
Paste your full size tube and place it to the right of your frame
We will be working with the elements along the bottom of the frame
Moving left to right and resizing by 50% as we go
Chalice
Bottle of Dominion
Laced Heart
Devil cupcake
Paste tribal rose as new layer and resize by 50%
Paste on the left side of the frame
Paste bow as new layer and resize about 60% -place at the top
of the frame
Paste skullfly as new layer and resize about 30%
Paste it on top of the bow
Paste paper 7 as new layer and move to bottom of layers
Apply your mask and merge group
Don't forget to add all copyright information
Kit makers like to be acknowledged as well
Now grab your cropping tool
Crop any excess canvas we did not use
Now is when you will resize your canvas to as size
you're comfortable with
Then you can go ahead and delete that white background layer
so you can have a nice clear transparent background
Merge visible layers and you are finished.
Thank you for following my tutorial.
Thursday, June 2, 2011
Totally Smitten-PTU

__________________________________________________________
***This tutorial is for advanced PSP users only- it is not intended for beginners***
Supplies Needed:
Tube of choice-I used a Keith Garvey-here
Scrapkit-I used Totally Smitten by Wicked Creationz Scraps-here
Font of choice
Plugins:
Mura Meister-Copies
Open new canvas 600x600
White background-we will be deleting this later
Its just easier for me to work on
Paste flower element as new layer and center
Resize by 30% and open Copies plugin
Use the following settings

Click inside flowers with magic wand
Modify-expand by 3
Paste paper 9 as new layer
Invert and delete
Move paper layer under frame layer
Do not deselect
Paste tube as new layer
Center
Duplicate and close off
On the original tube
Hit delete on keyboard
Deselect all
Unhide duplicated layer
Erase the part of the tube that is hanging over the bottom
Paste the following elements as new layers
and resize as you go
Smitten bag
Cupcake
Flower 2
Place smitten bag to the left and tilt it slightly to the left
Place cupcake next to it but in front of it (layer wise)
Place flower 2 at the bottom of frame
Paste ribbon as new layer and resize by 40%
Place on the left of the frame
Paste bow 2 as new layer and resize
Place on the right side of the frame
Paste clip as new layer and move to the bottom of layers
but above the background layer
Flip and mirror
Duplicate
Flip and mirror
They should be behind the frame but visible
Paste confetti as new layer and move below the clip layers
Place to the top left of frame
Duplicate and flip
Paste flutterby trial as new layer
Place anywhere you wish to
Don't forget to add all copyright information
Kit makers like to be acknowledged as well
Now grab your cropping tool
Crop any excess canvas we did not use
Now is when you will resize your canvas to as size
you're comfortable with
Then you can go ahead and delete that white background layer
so you can have a nice clear transparent background
Merge visible layers and you are finished.
Thank you for following my tutorial.
Subscribe to:
Posts (Atom)